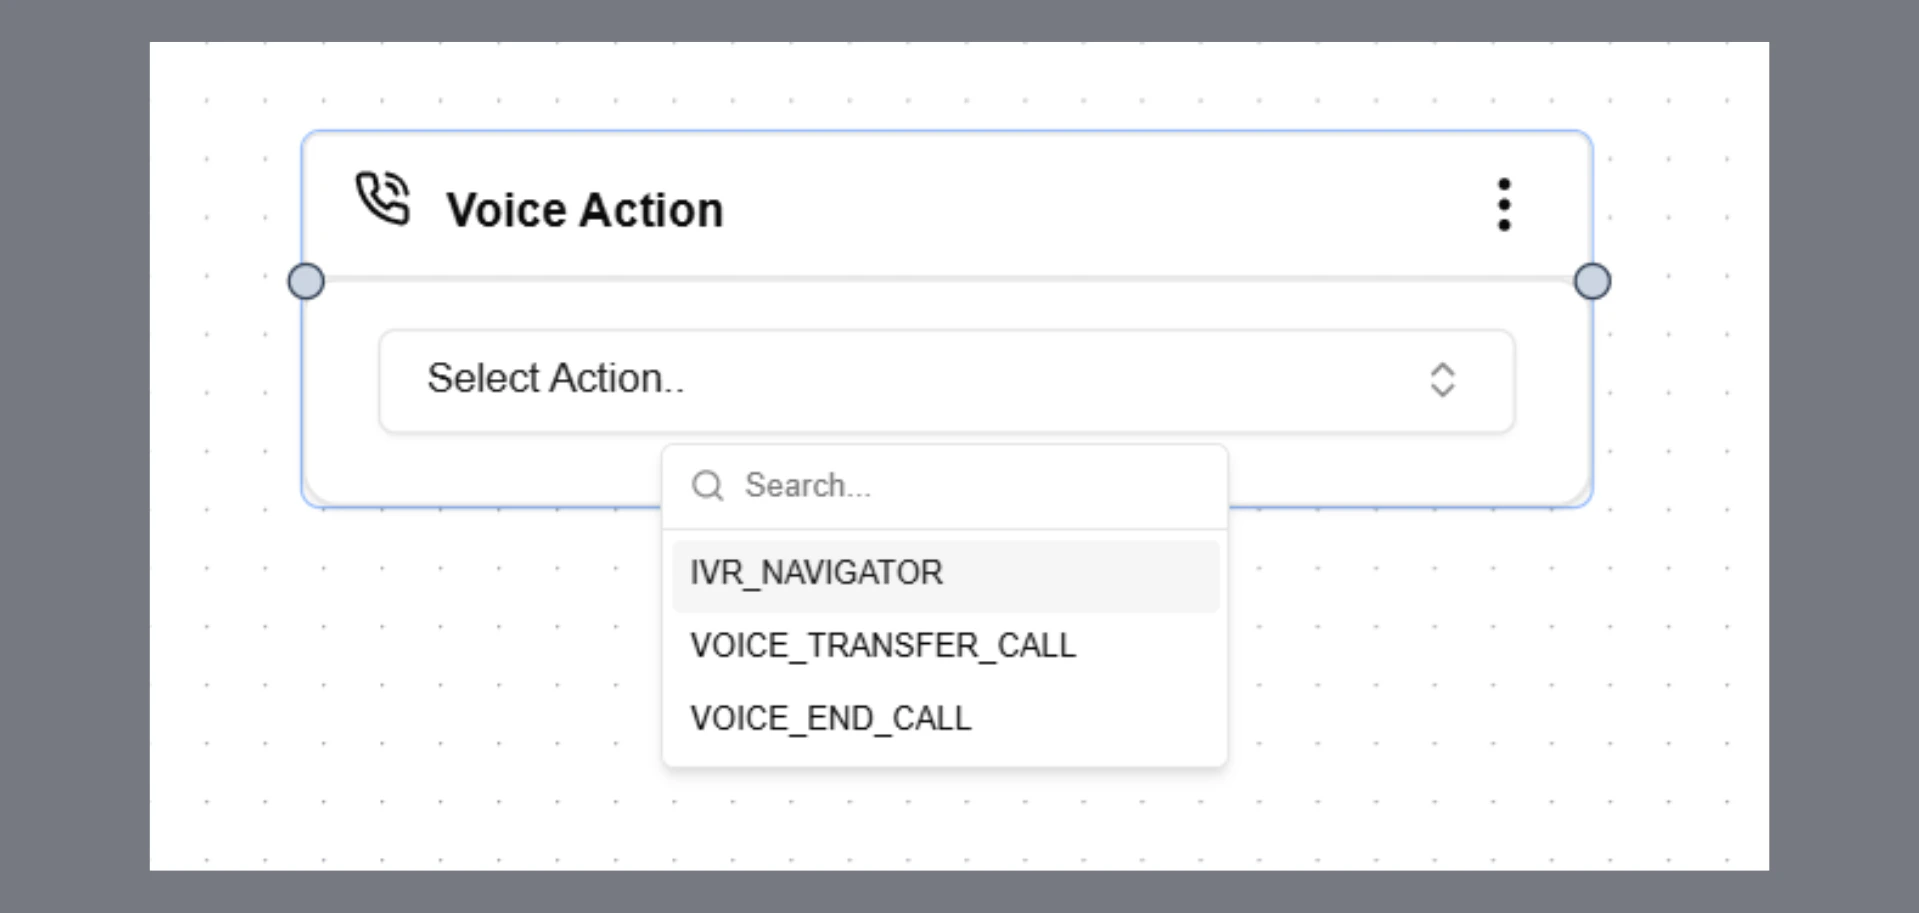
- Select Voice Action from the left node panel and add it to the workflow canvas
- Add the function inside a Response node using Add Function
IVR Navigator
Enable your AI agent to navigate IVR systems and make outbound calls like a human caller. The agent sends keypad inputs (DTMF) when required, responds naturally when prompted for speech, and seamlessly continues the interaction if a human agent joins.How It Works
When an outbound call is placed, the receiving system may respond with:- A traditional IVR menu
- A conversational AI system
- A live human agent
- Or a combination of all three
Press vs. Say
- If the IVR says, “Press 1 for English.”
→ The agent sends a keypad digit using IVR Navigator - If the IVR says “Say 1” or asks a question
→ The agent responds using normal speech
Supported IVR Types
Press-type”Press 1 for X, Press 2 for Y”
→ IVR Navigator is triggered Say-type
”Say 1 for English” or open-ended prompts
→ Handled via normal speech (no tool call) Conversational AI
Acts like a human and asks questions
→ IVR Navigator is used only if numeric input is explicitly required Mixed (IVR + Human)
IVR transitions to a human and may return to keypad input
→ IVR Navigator is triggered only for digit-based steps
How to Configure
Step 1: In Agent Builder, select the Voice Action and addivr_navigatoras an action.
Step 2: Add a Description to define when the agent should trigger ivr_navigator.
Recommended:Always call this tool only when the IVR explicitly asks for numeric input (e.g., “press” or “enter” a digit/number).
Do NOT call this method for spoken responses or unclear prompts. Step 3: Set IVR starts conversation? (Yes / No)
Specify whether the IVR system begins speaking at the start of the call.
- Yes → Use this when the call starts with an IVR greeting or menu.
The agent will wait for the configured Pause Delay before processing, ensuring the full message is received. - No → Use this when no initial IVR delay handling is needed.
The agent will begin processing immediately.
Defines how long (in milliseconds) the agent waits after IVR speech before taking action. IVR systems often deliver menu options in fragments with short pauses. Without a delay, the agent may act too early. Recommended: 2000 ms

Step 4: Write your agent system prompt
All navigation logic, goals, and behavioral constraints should be defined in the agent’s system prompt.Agent Prompt Guide
Define the goal
Clearly specify what the agent must achieve. Example:Navigate the IVR system, retrieve required information, complete necessary inputs, and connect to a human agent if needed.
Provide a navigation path (recommended)
If the IVR structure is known, include the expected flow. This significantly improves reliability. Example:- Select language
- Select account type
- Select service category
- Proceed to the target function
Pass caller data as dynamic variables
Provide structured data the agent may need during the call:- Mobile number
- Reference or account number
- Policy or claim ID
- Verification details (e.g., last 4 digits of SSN)
Set the agent persona
Without a defined persona, the agent may behave incorrectly (e.g., like a support agent). Recommended instruction: The agent should behave as a caller seeking assistance.It should not act as a support representative or provide solutions, explanations, or guidance.
Behavioral Guidelines
To ensure reliable IVR navigation:- Only act when input is explicitly requested
- Do not respond to informational (e.g., hold music, “please wait”)
- Do not guess or assume menu options
- Do not press fallback keys (e.g., 0 or 9) unless explicitly instructed
- Separate digit input actions from spoken responses
Notes
- Digit inputs are irreversible once sent
- Incorrect timing can lead to failed navigation
- IVR systems may change over time—regular testing is recommended
VOICE_TRANSFER_CALL
This action transfers an active call to another agent, team, or phone number. This feature works only for phone calls and is not supported for web calls.When to Use
Use this action when:- The user asks to speak with a human agent
- The request requires human assistance
- The conversation needs escalation
- The workflow needs to route the call to another department
How to Configure
Step 1: Select Action
Select the action from the dropdown:Step 2: Transfer To
Define the phone number or variable where the call should be transferred. Static example:The phone number must be in E.164 international format including the country code.
Step 3: Transfer Types
SigmaMind supports two transfer types:- Cold Transfer
- Warm Transfer
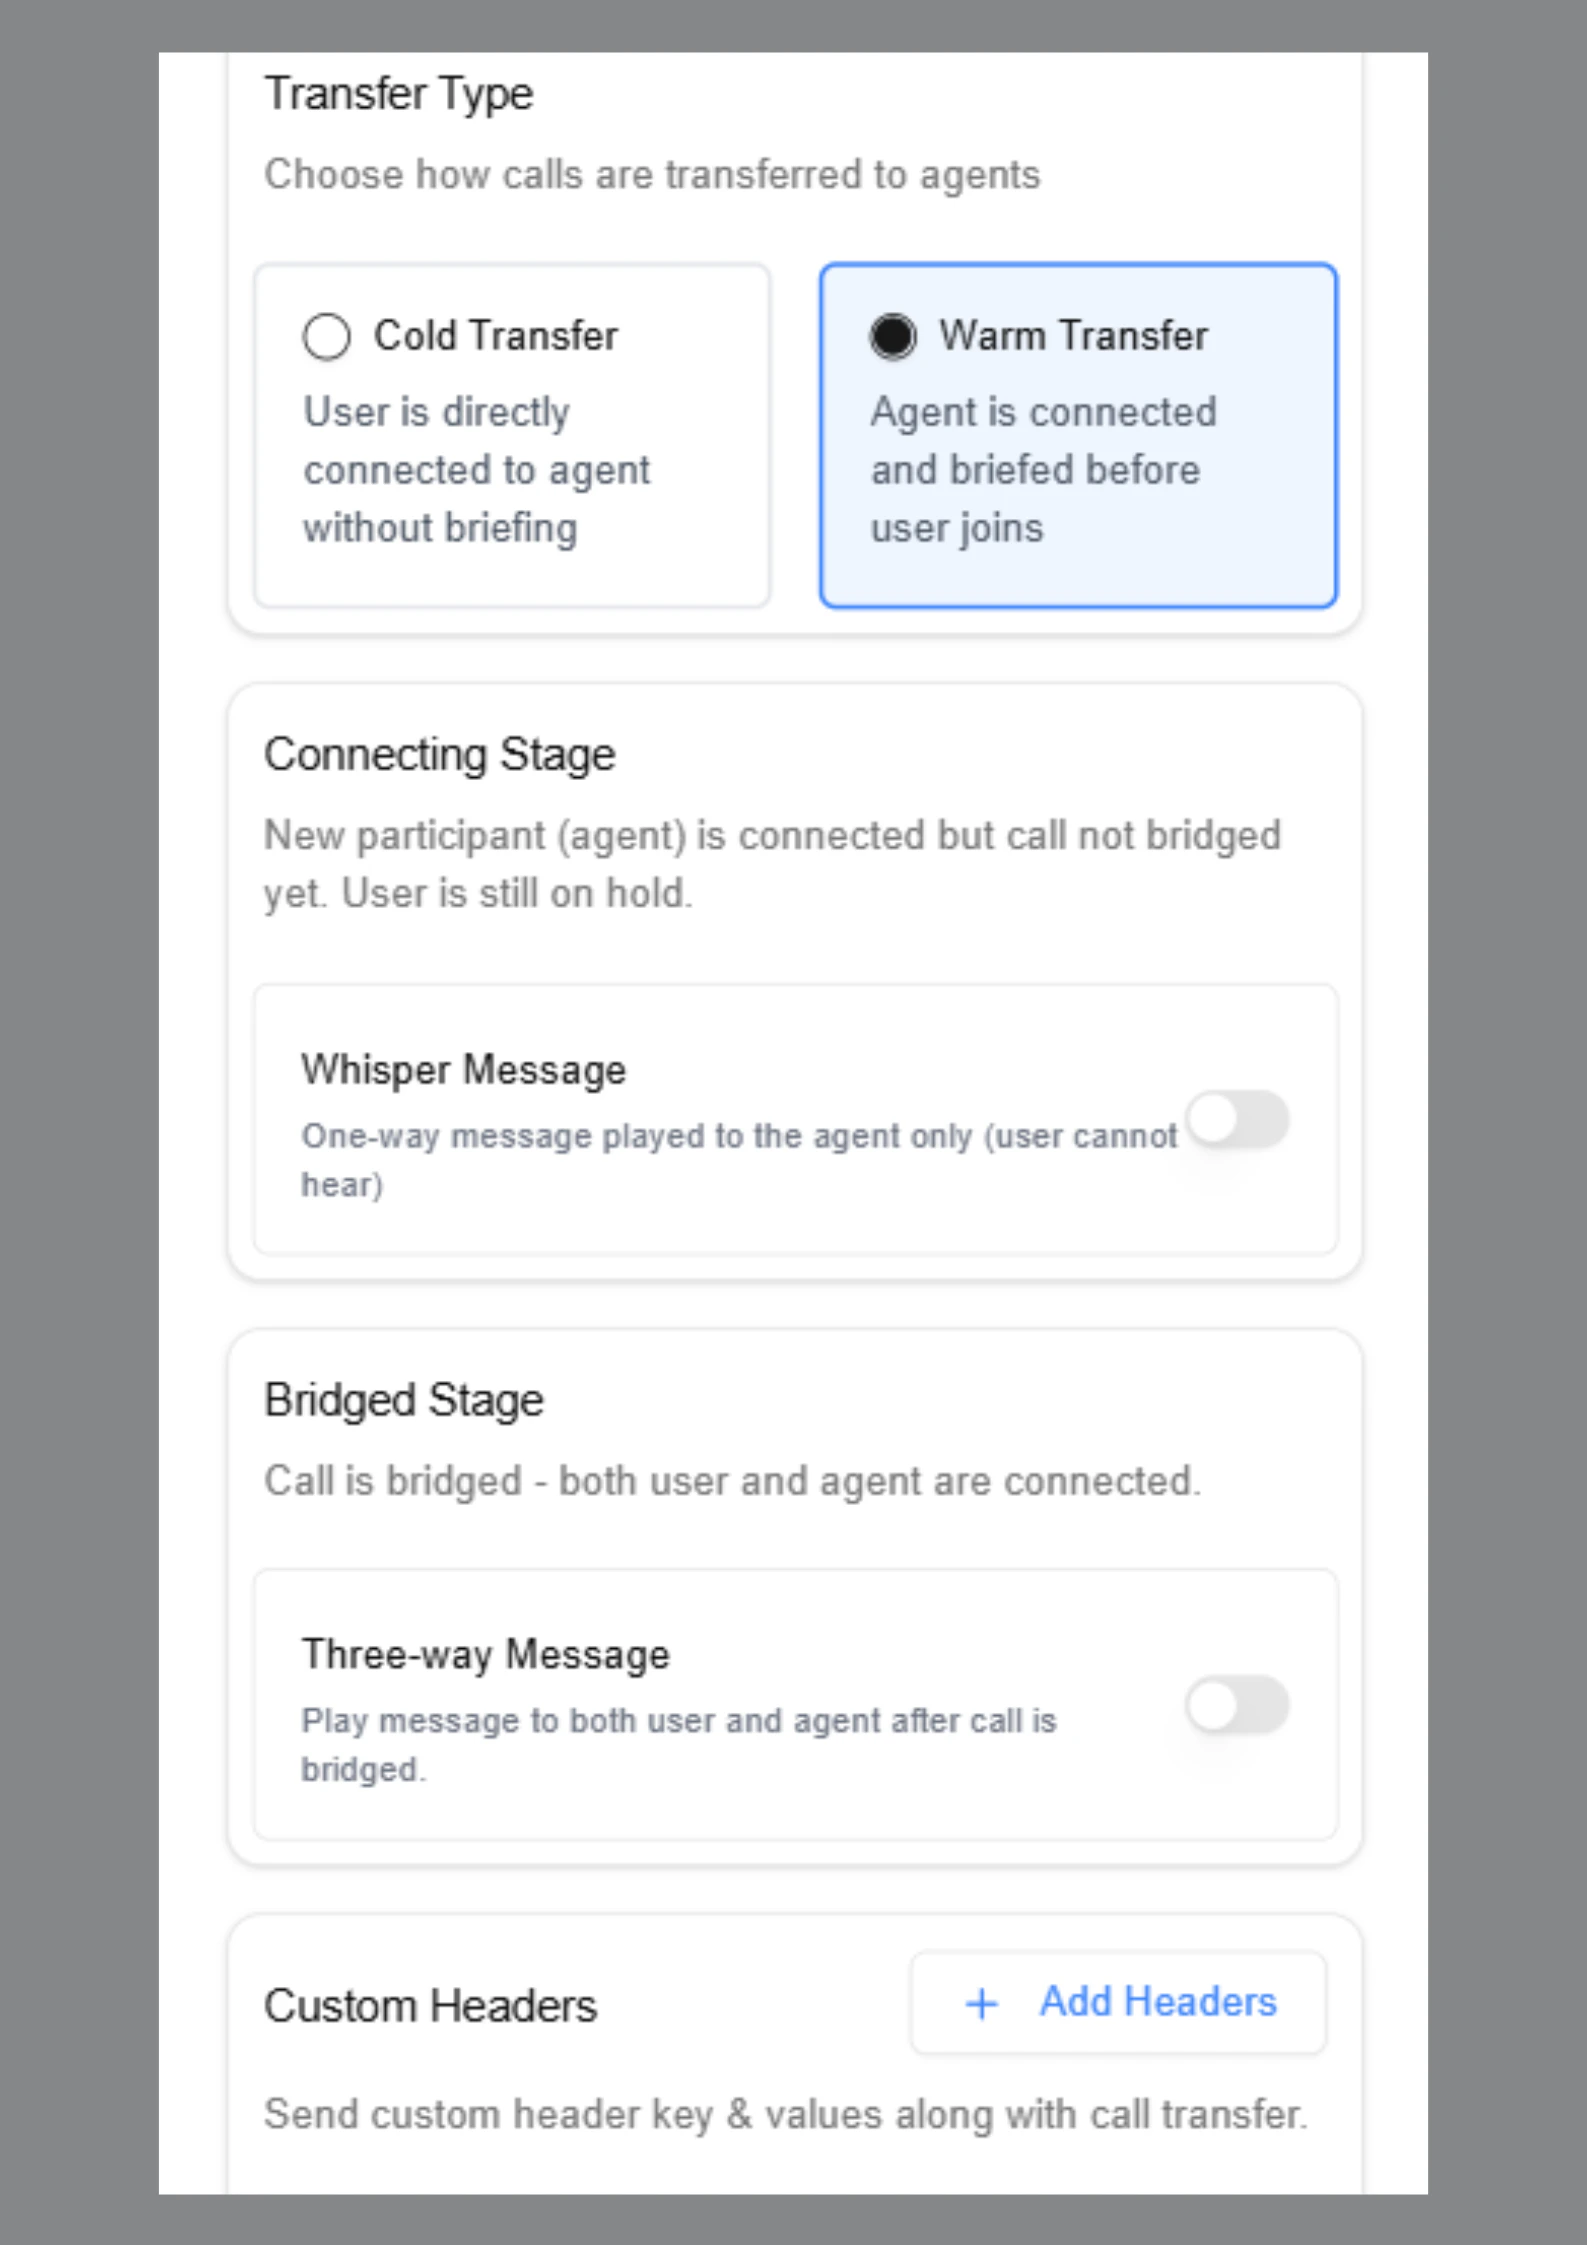
Cold Transfer
Cold transfer immediately connects the caller to the destination number. Behavior:- AI transfers the call and exits the conversation
- No context is shared with the receiving agent
- Caller hears ringing and connects directly
- Context is not required
- Simple routing is needed
- Fast escalation is required
Warm Transfer
Warm transfer connects the receiving agent first, shares context, and then bridges the caller. This ensures a smoother handoff experience. Warm transfer includes two stages:- Connecting Stage
- Bridged Stage
Stage 1: Connecting Stage
The receiving agent is connected while the caller remains on hold.Whisper Message
A Whisper Message is played only to the receiving agent. The caller cannot hear this message. You can configure this as:- Static message
- Prompt-generated message
Stage 2: Bridged Stage
In this stage, both the caller and the human agent are connected. You can optionally enable a Three-way Message that is played to both participants. Example:Custom Headers (Optional)
Custom headers allow structured metadata to be sent during the transfer. Example:Execution Flow
VOICE_END_CALL
The VOICE_END_CALL action allows the AI agent to end the call automatically when the conversation is complete.
When to Use
Use this action when:- The conversation is complete
- The user’s request has been resolved
- The user says goodbye
- The user asks to end the call