- Add a new custom app
- Create custom tool actions
- Define dynamic input variables
- Test API actions
- Embed and use tools inside your AI agent
Step 1: Add a Custom Tool/App
If your app is not available in the marketplace, you can create a custom tool.
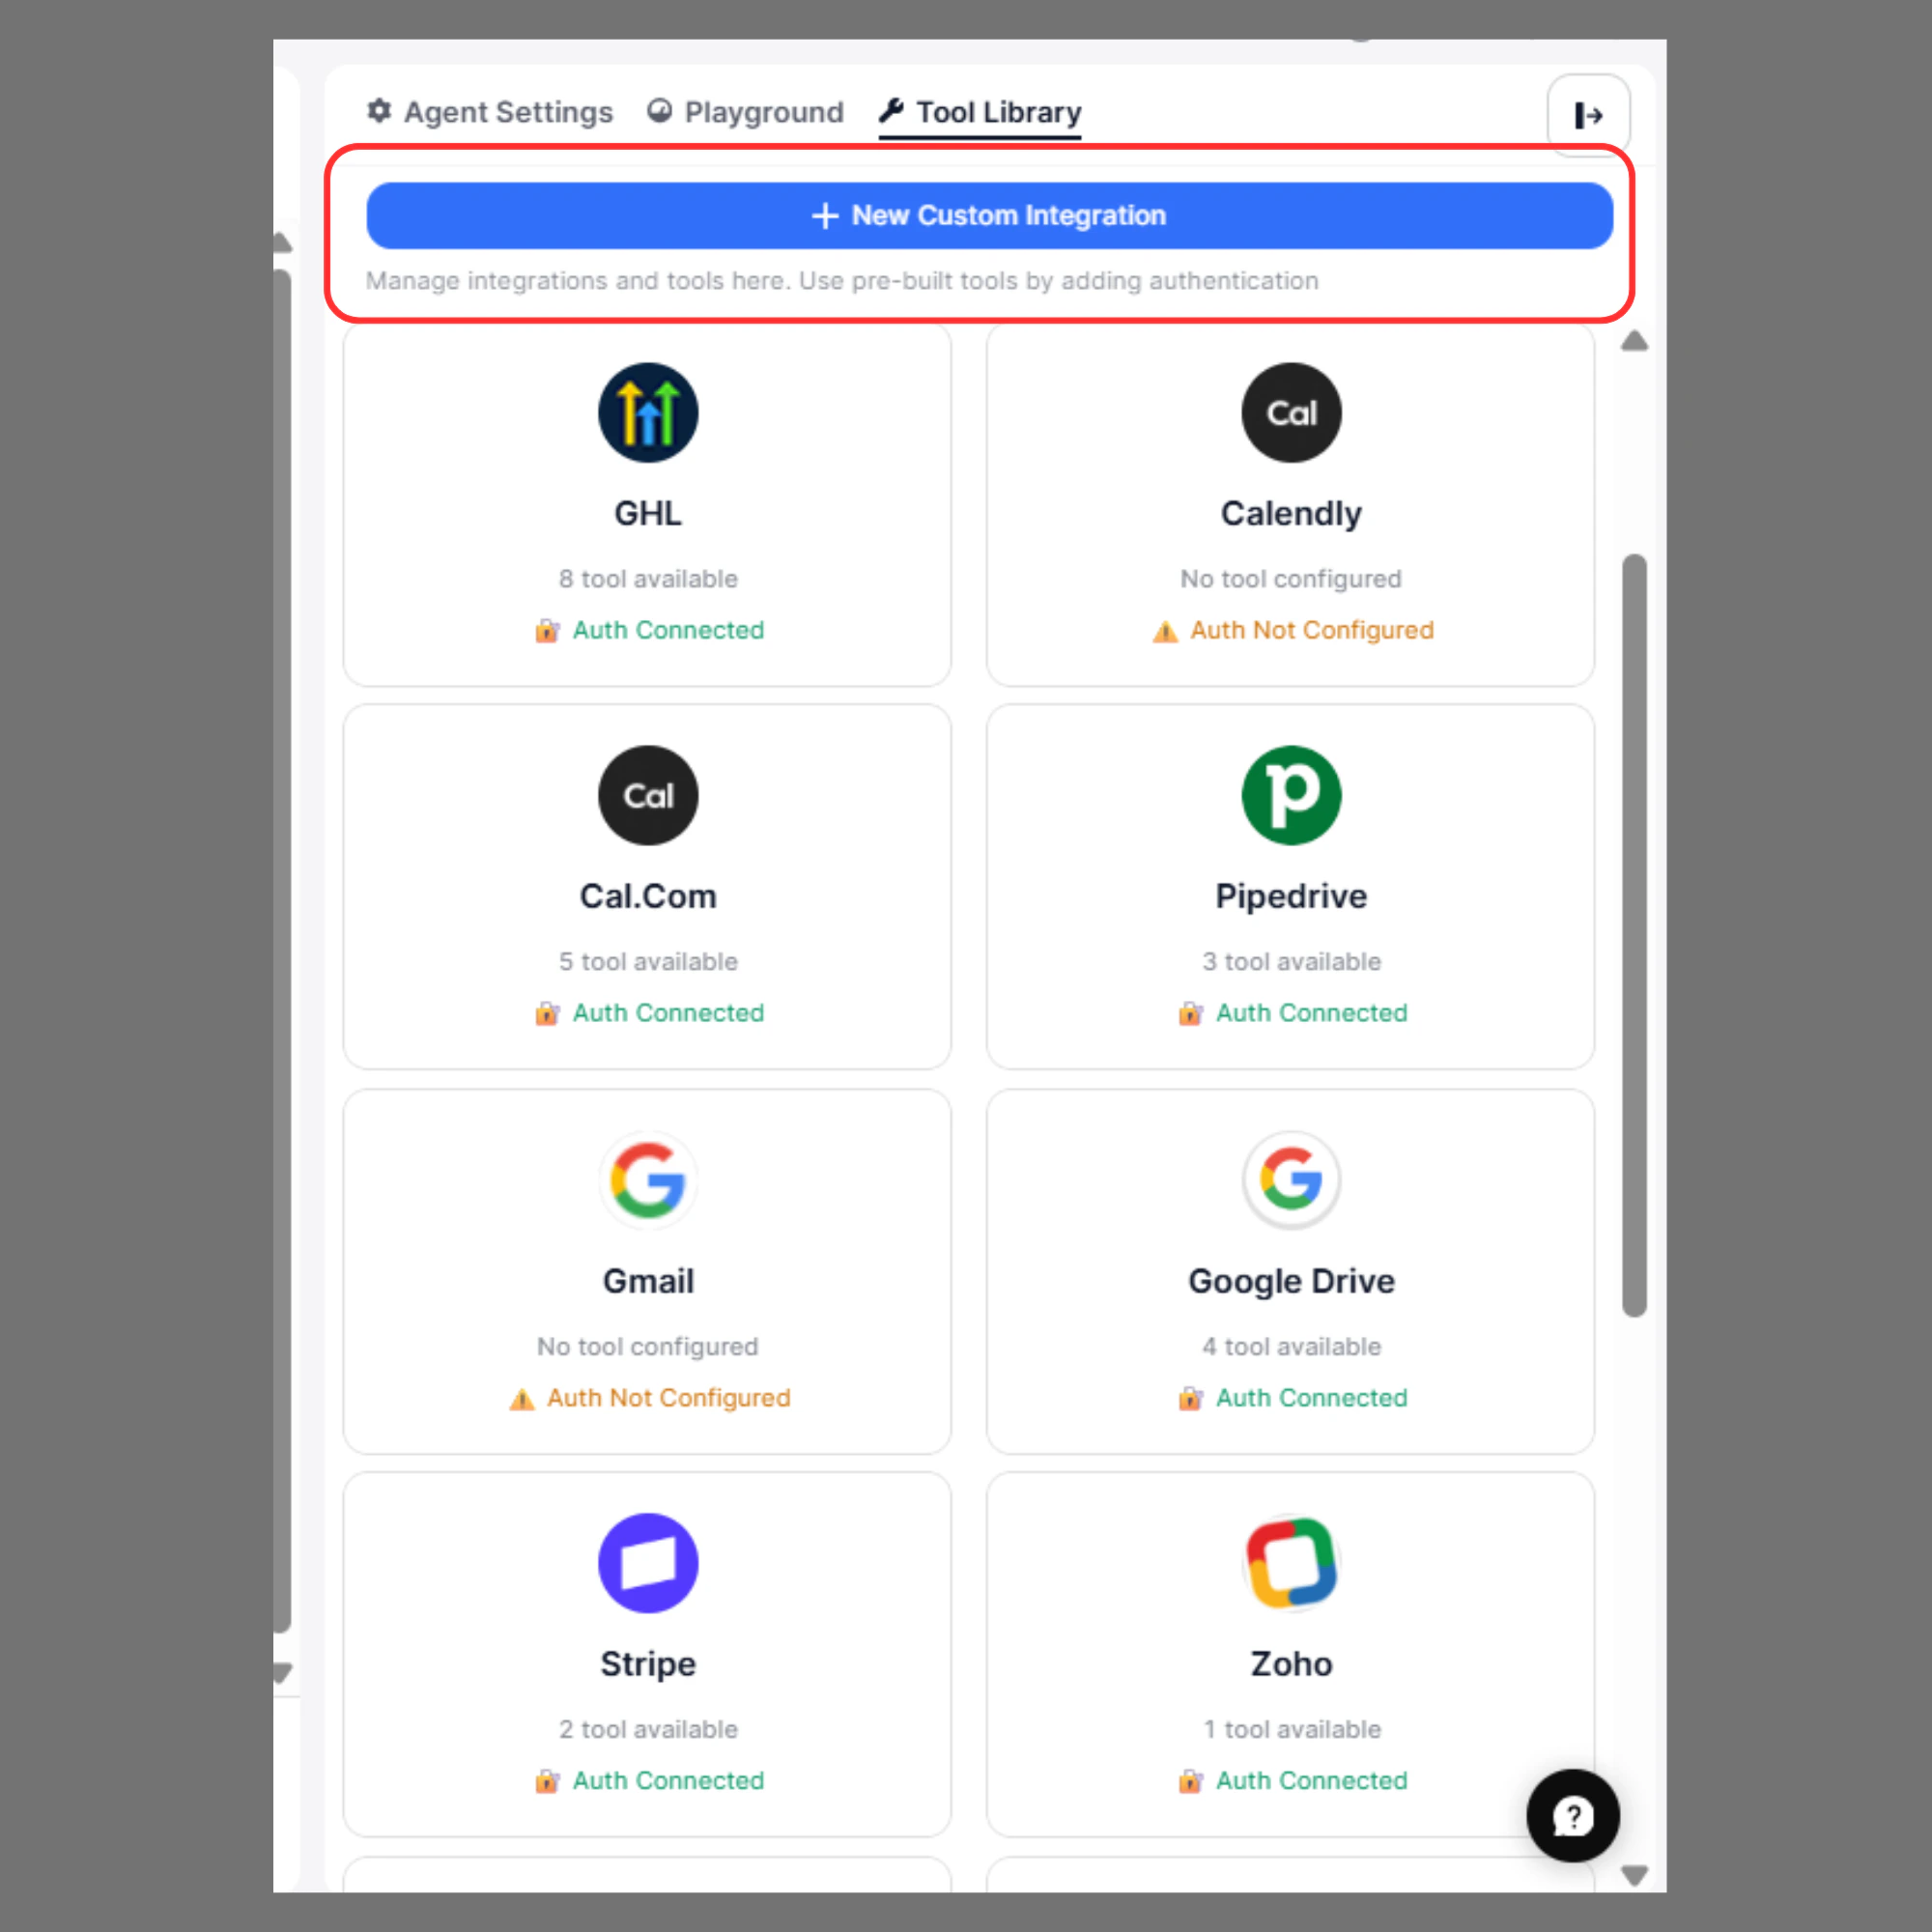
Steps:
- Open Agent Builder
- Click the Manage Tools/Apps
- Click Add Custom Tool/App
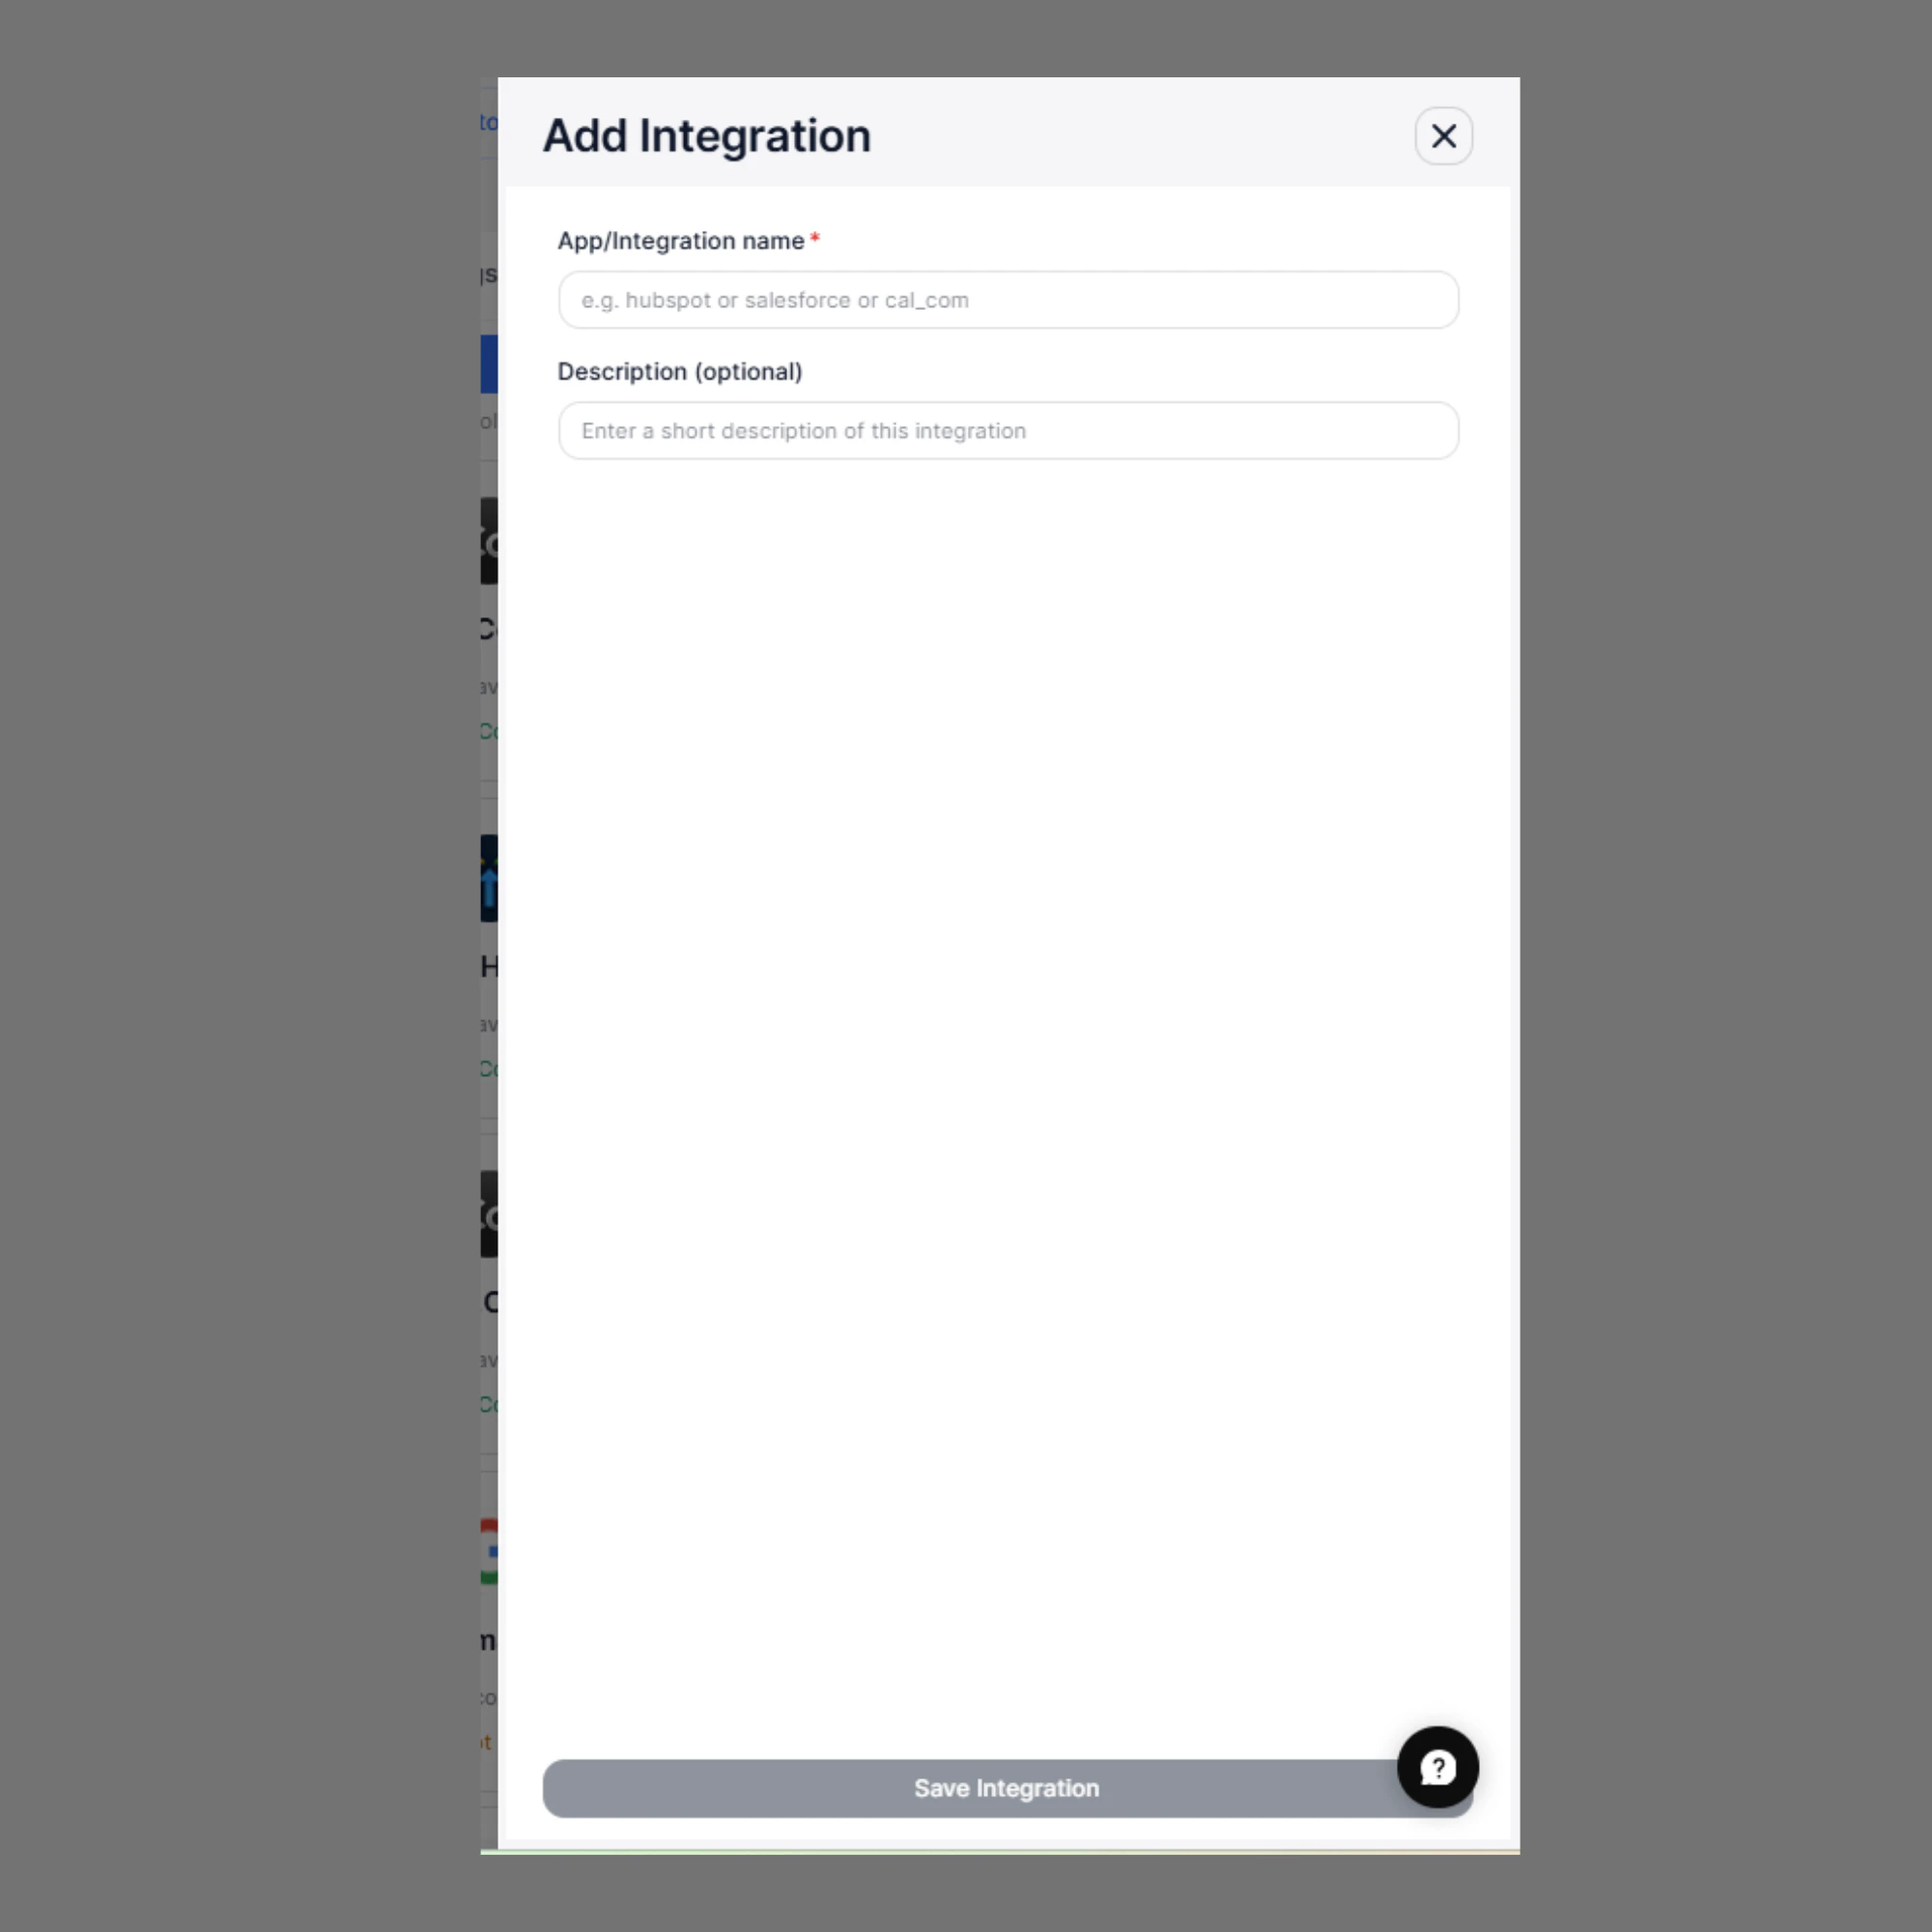
- Enter the following:
| Field | Description |
|---|---|
| Tool/ App name | Name of the external app (e.g., Calendly, Custom CRM) |
| Description (Optional) | Description of the tool |
- Click Submit Tool/App

Step 2: Configure Authentication
Before creating actions, configure authentication based on the app’s API.
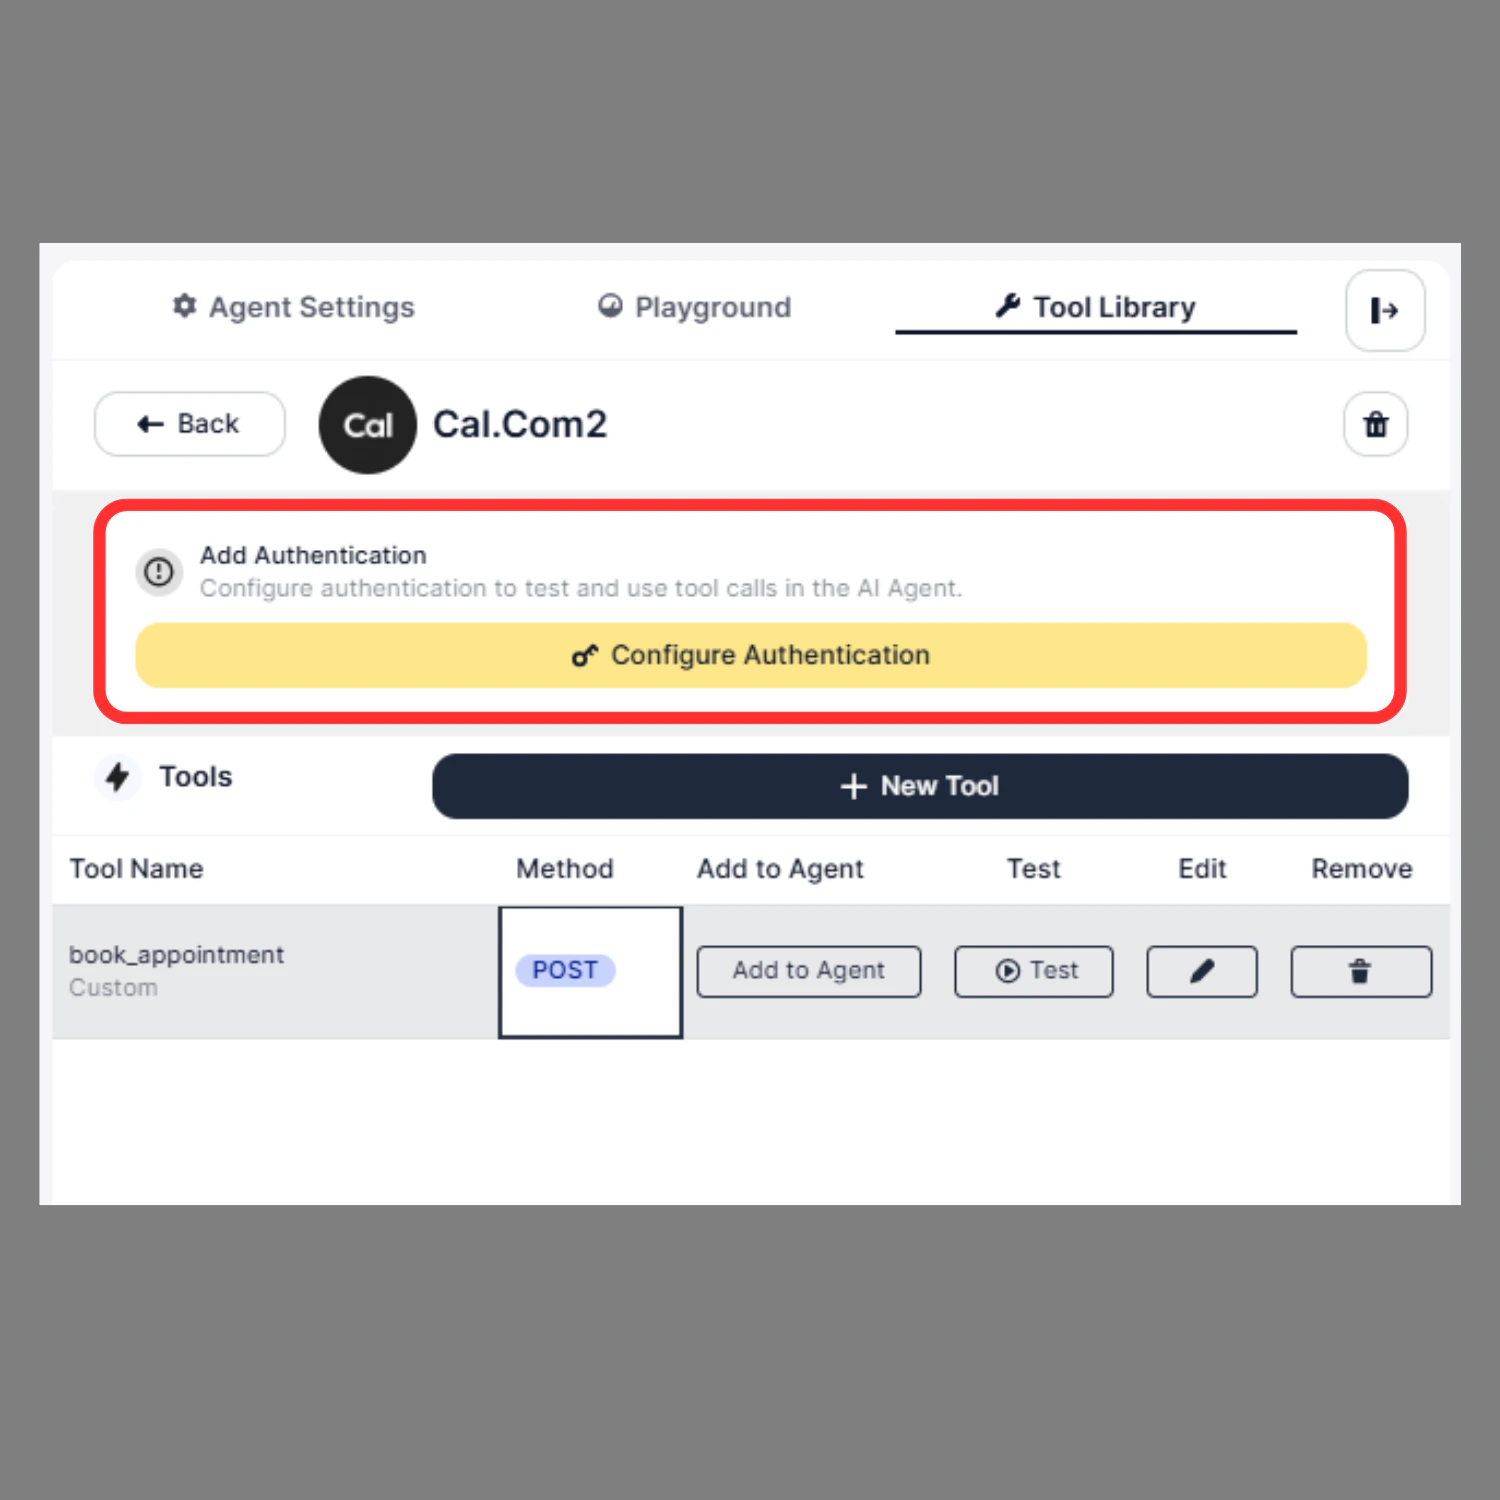
- Click the app or custom tool that you want to configure authentication for.
- Click Configure Authentication
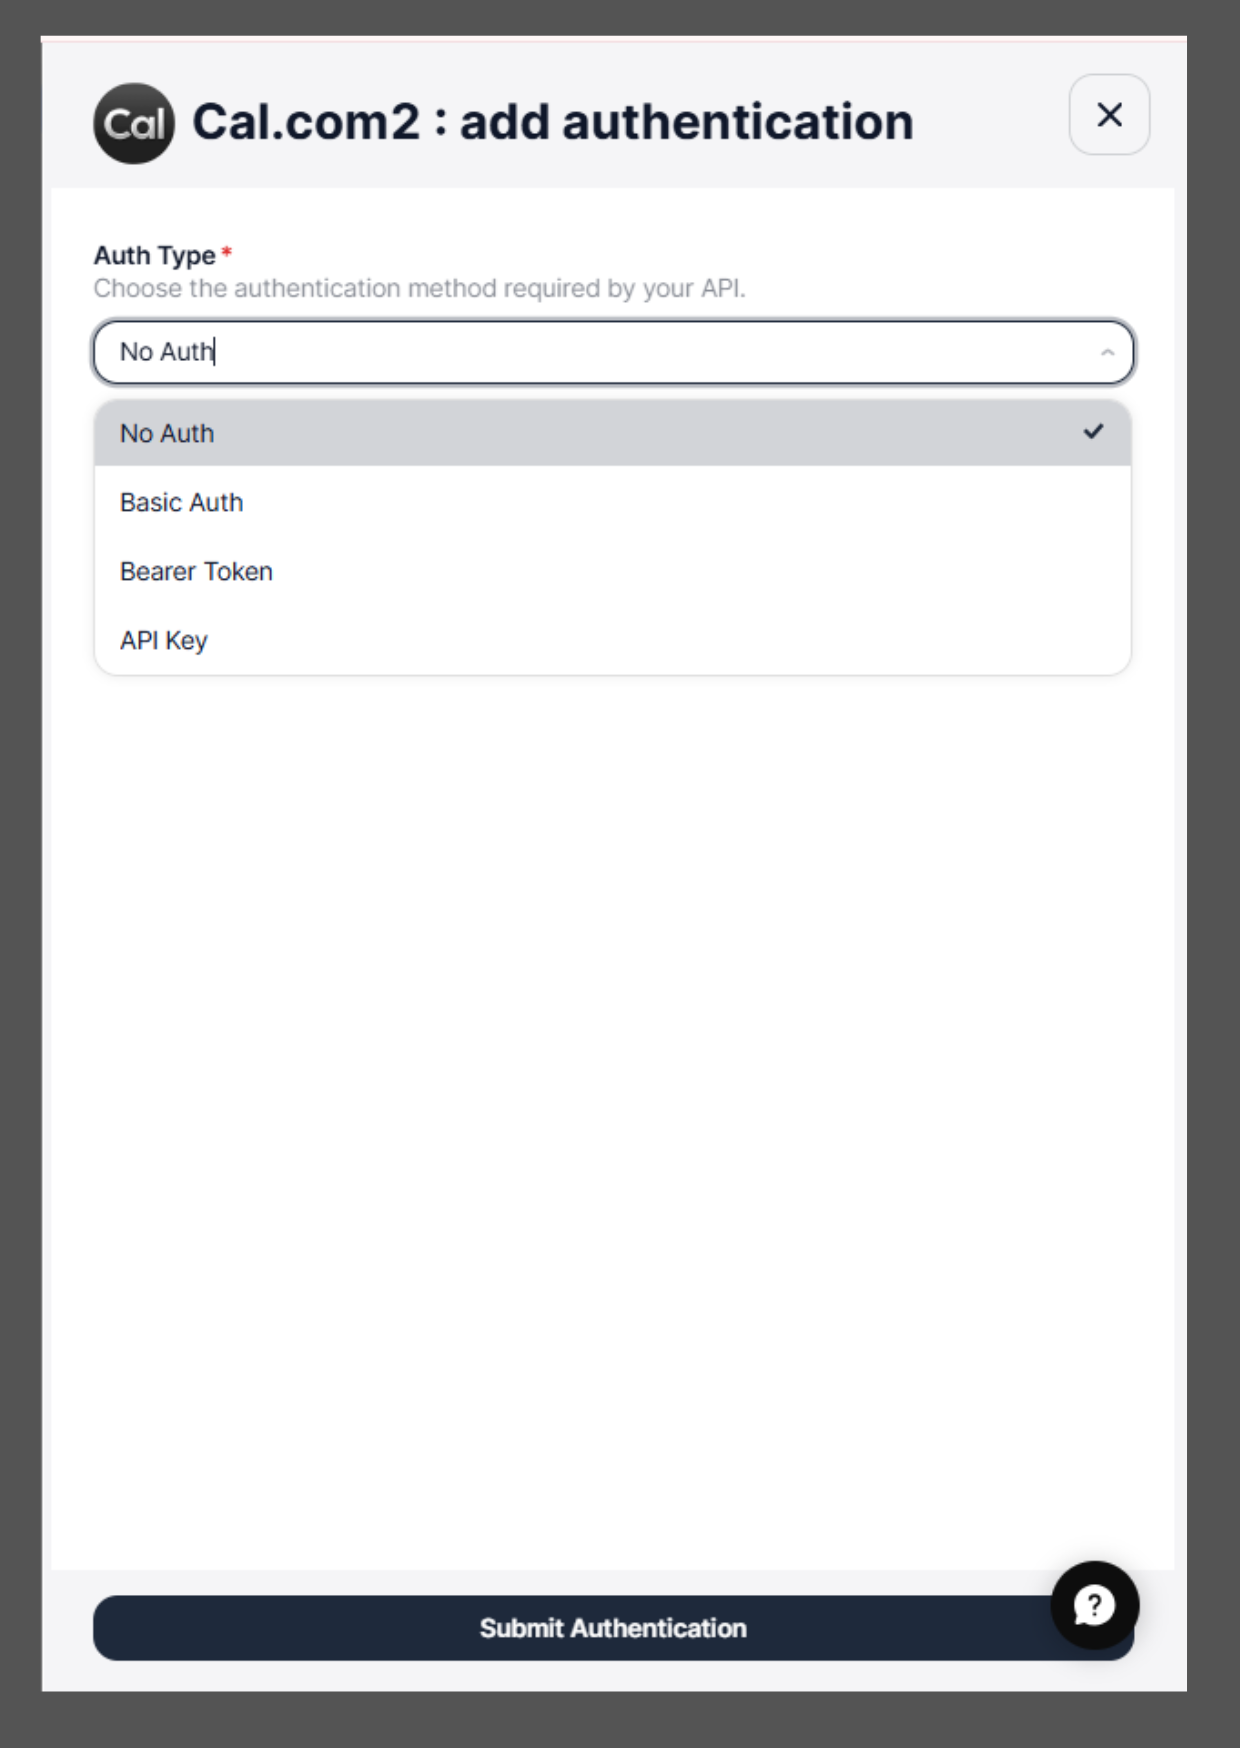
- Select the required Auth Type
- Enter credentials
-
Click Submit Authentication

For detailed instructions on authentication types and configuration steps, refer to the Overview page
Step 3: Add Tool Action
Tool actions define what operation the AI agent can perform using the API..png?fit=max&auto=format&n=c-F9Y7NxUCrvJK6l&q=85&s=210c5ddd8053cf740483bbaf296bac04)
Steps:
- Click Add Tool Actions
- Enter the following details:
| Field | Description |
|---|---|
| Action Name | Name of the action (e.g., Reschedule Booking) |
| Description(Optional) | What the action does |
| Endpoint URL | API endpoint URL |
| Request Method | GET, POST, PUT, DELETE |
| Headers | Required headers from API documentation |
| Body | Request payload |

Action Name
Definition:A unique identifier for the tool action. The agent uses this name internally to trigger the correct API call. Requirements:
- Must be unique
- Use snake_case format
- No spaces allowed
Description (Optional)
Definition:Explains when and why the agent should use this action. This helps the AI understand the correct context for calling the API. Example:
HTTP / Request Method
Definition:Specifies the type of operation to perform on the API. Supported methods:
- GET → Retrieve data
- POST → Create data
- PUT → Update data
- PATCH → Partially update data
- DELETE → Remove data
Endpoint URL
Definition:The API endpoint where the request will be sent. You can use input variables to dynamically insert values. Static example:
{{ticket_id}} will be dynamically provided by the agent.
Headers
Definition:Headers provide additional information required by the API, such as authentication and content type. Common headers example:
| Key | Value |
|---|---|
| Content-Type | application/json |
| Authorization | Bearer access_token |
Query Parameters
Definition:Query parameters allow you to filter or modify the API response. These are appended to the endpoint URL. Example configuration:
| Key | Value |
|---|---|
| status | ticket_status |
Request Body
Definition:The request body contains the data sent to the API when creating or updating resources. You can use input variables to dynamically pass values.

| Variable | Value |
|---|---|
| subject | Login issue |
| description | User cannot login |
| priority | high |
Input Variables (variable_name)
Input variables are dynamic placeholders written inside double curly braces, variable_name. These placeholders are automatically replaced with real values extracted from the user’s conversation when the API request is executed. The agent automatically fills these values based on:- User input
- Conversation context
- Agent configuration
- Endpoint URL
- Query Parameters
- Request Body
Complete Example: Get Ticket Details
Action NameHow Input Variables Work
Conversation Example:
User: I want to reschedule my appointment for tomorrow at 10 AM.What SigmaMind AI does:
- Extracts values from conversation
- Maps values to variables
- Replaces variables in the API body
- Calls the API automatically
Final API Request Sent:
- Click Submit Action
You can add new actions to an existing integration in the App Marketplace in the same way, allowing your AI agent to perform additional operations using the connected app.
Step 4: Test Tool Action
You can test a tool action to verify that the API works correctly before using it in your agent.
Steps:
- Go to Manage Tools/Apps from the Agent Builder
- Select the tool (for example, Cal.com)
- In the Tool Actions section, locate the action you want to test
- Click the Test button next to the action
-
Enter test values for the detected input variables (such as
{{start_date}},{{end_date}},{{event_type_id}}) - Click Test API Action
-
Review the response to confirm the API is working correctly

Step 5: Use the Custom Tool in the Agent
After creating and testing your tool actions, you must add them to your agent. This allows the agent to call the tool during conversations and perform real-world operations.Steps:
- Open the Agent Builder
- Click Add Tool/Function Calls
- Click App Tool Call
- Select the tool/app you created or configured
- Select the action you want the agent to use
-
Click Submit

Example Agent Workflow
- User: I want to reschedule my appointment
- Agent collects the required information
- Agent calls Reschedule Booking action
- API processes the request
- Agent confirms the reschedule
Best Practices
- Always follow the API documentation of the external app
- Use clear variable names
- Test actions before enabling
- Configure authentication properly
- Use descriptive action names