> ## Documentation Index
> Fetch the complete documentation index at: https://docs.sigmamind.ai/llms.txt
> Use this file to discover all available pages before exploring further.
# How to Add New Integration
The **Add New Integration** feature lets you integrate external applications or APIs with your **SigmaMind AI** agent by creating custom tool actions. This is especially useful when the application you want to use (such as Zendesk or any other service) is not already available in the SigmaMind AI Marketplace.
By adding a custom tool, you enable your agent to communicate directly with external systems, send and retrieve data, and perform real-world operations automatically during conversations.
You can:
* Add a new custom app
* Create custom tool actions
* Define dynamic input variables
* Test API actions
* Embed and use tools inside your AI agent
This enables your Voice AI agent to perform real-world actions such as booking, rescheduling, fetching data, updating records, and more.
***
## Step 1: Add New Integration
If your app is not available in the marketplace, you can create a custom tool.
### Steps:
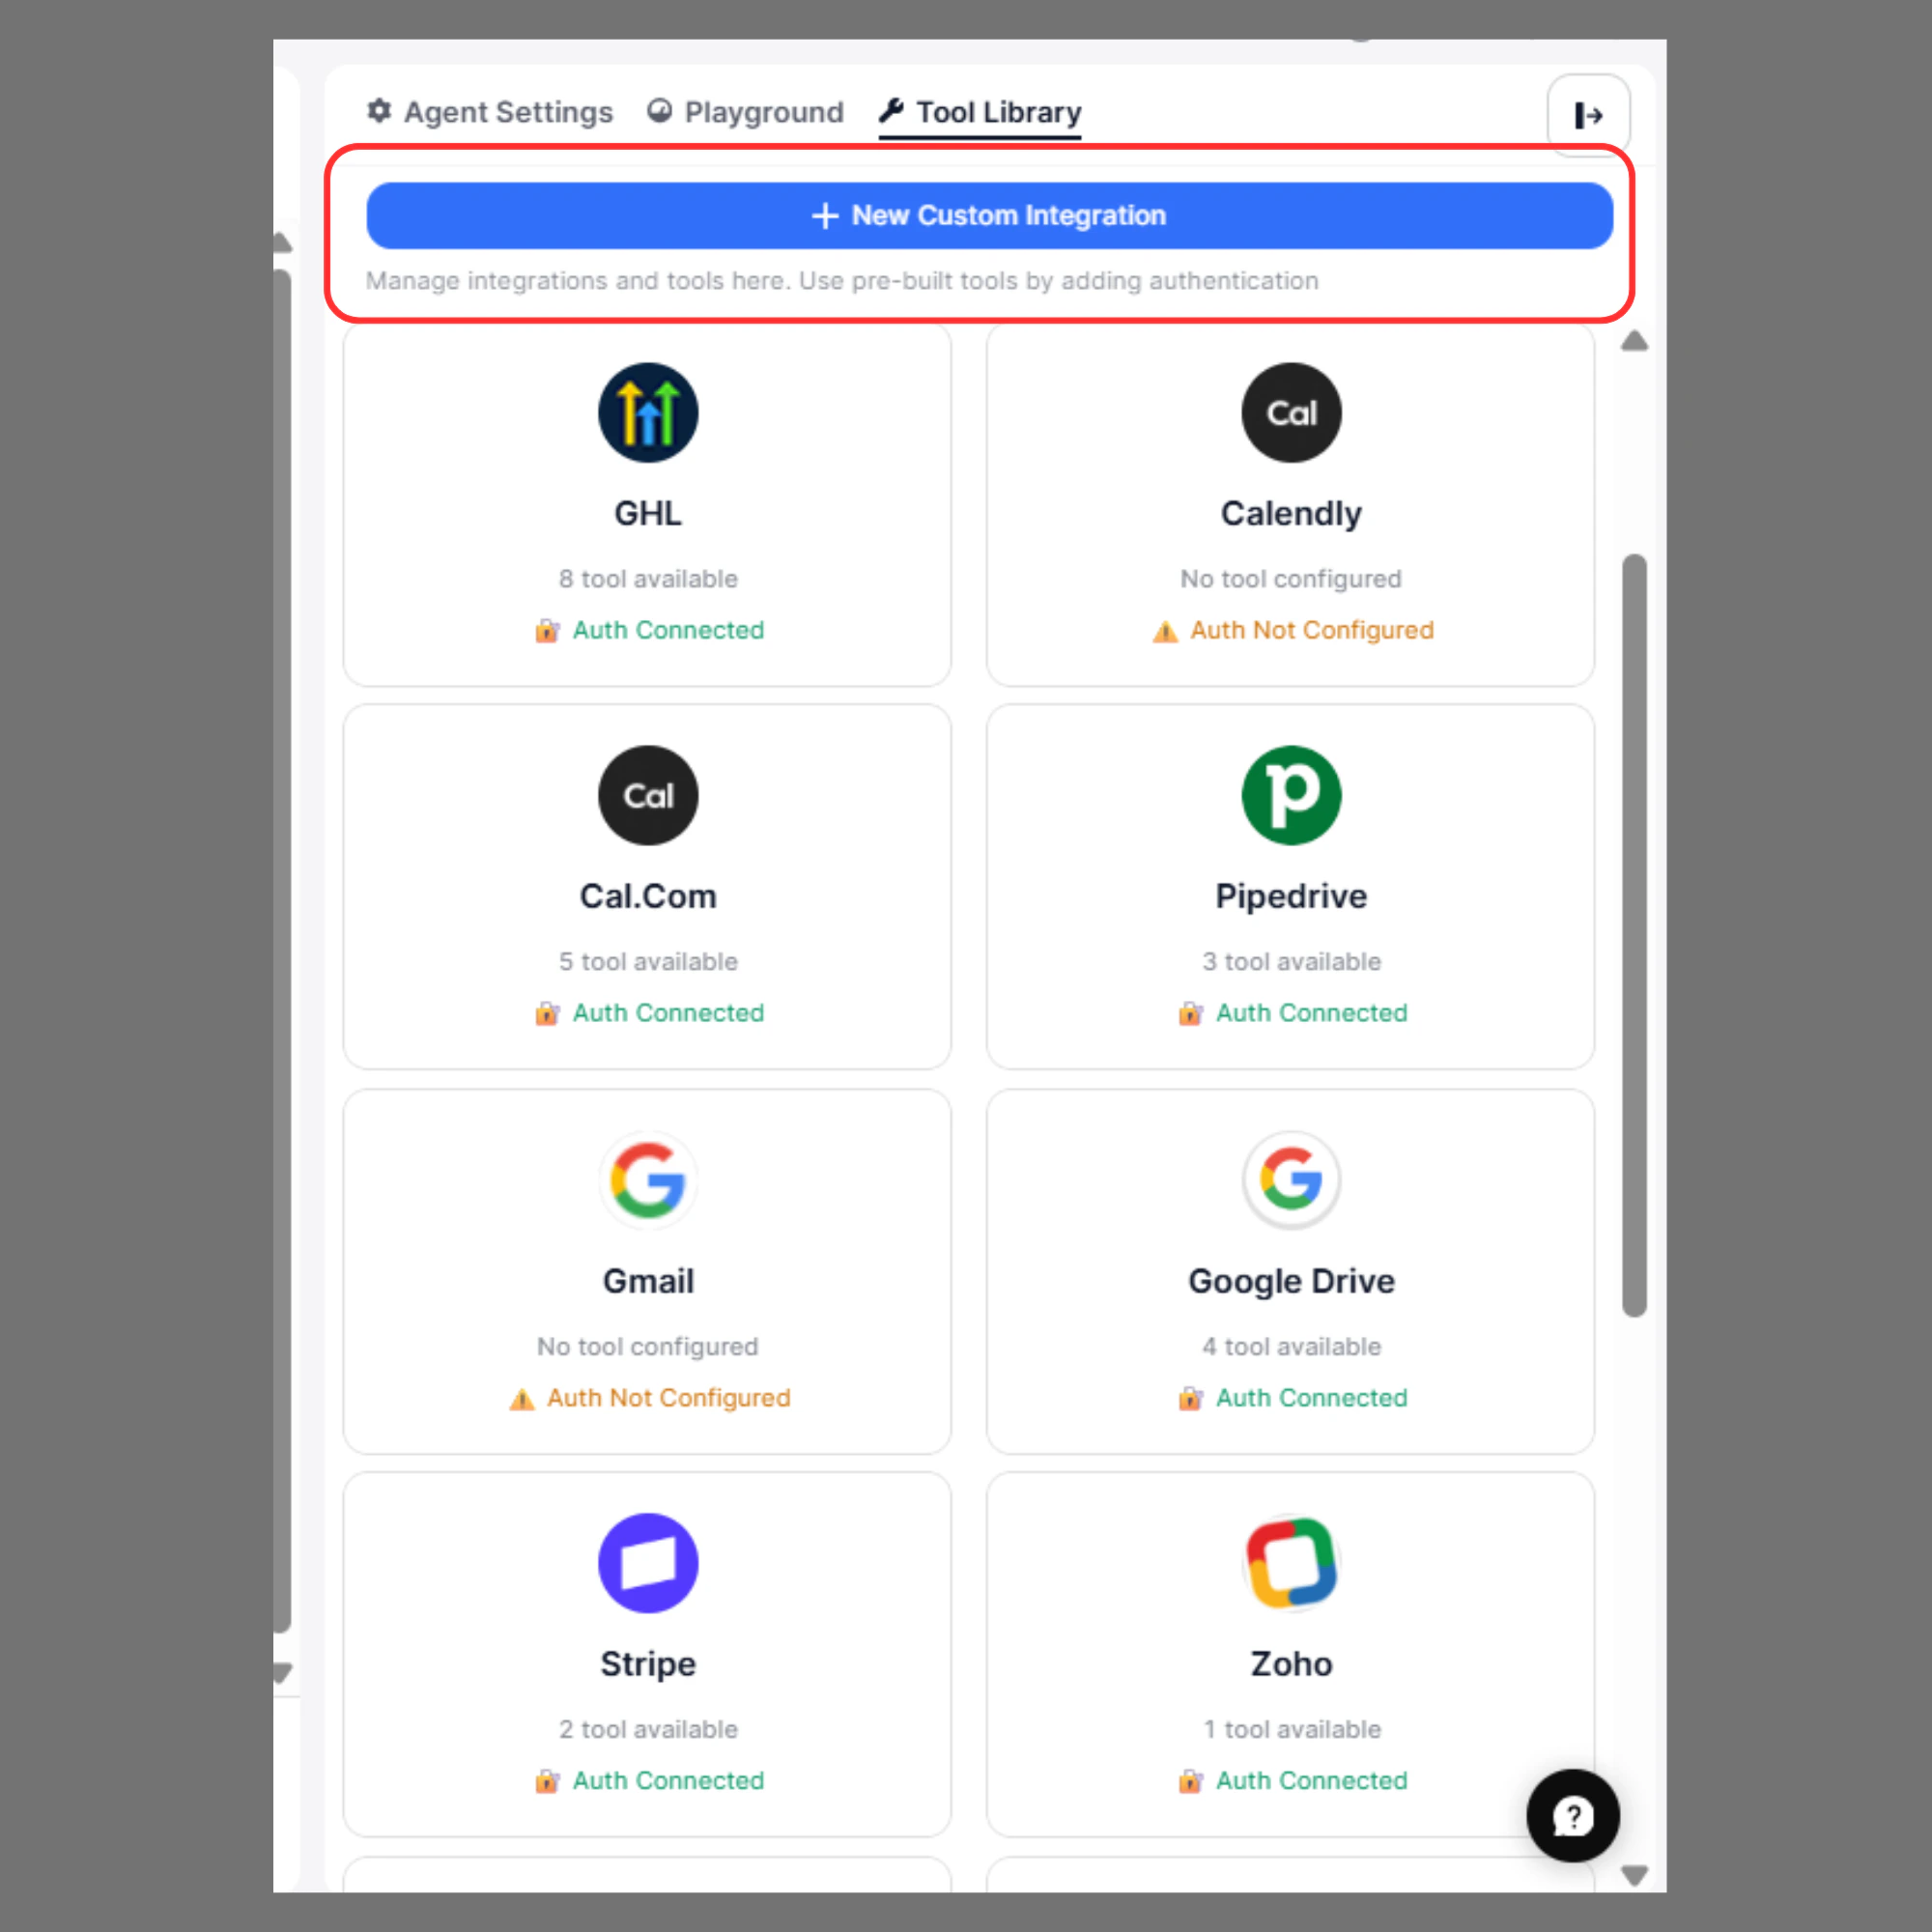
1. Open **Agent Builder**
2. Click the **Tool Library**
3. Click **Add New Integration**
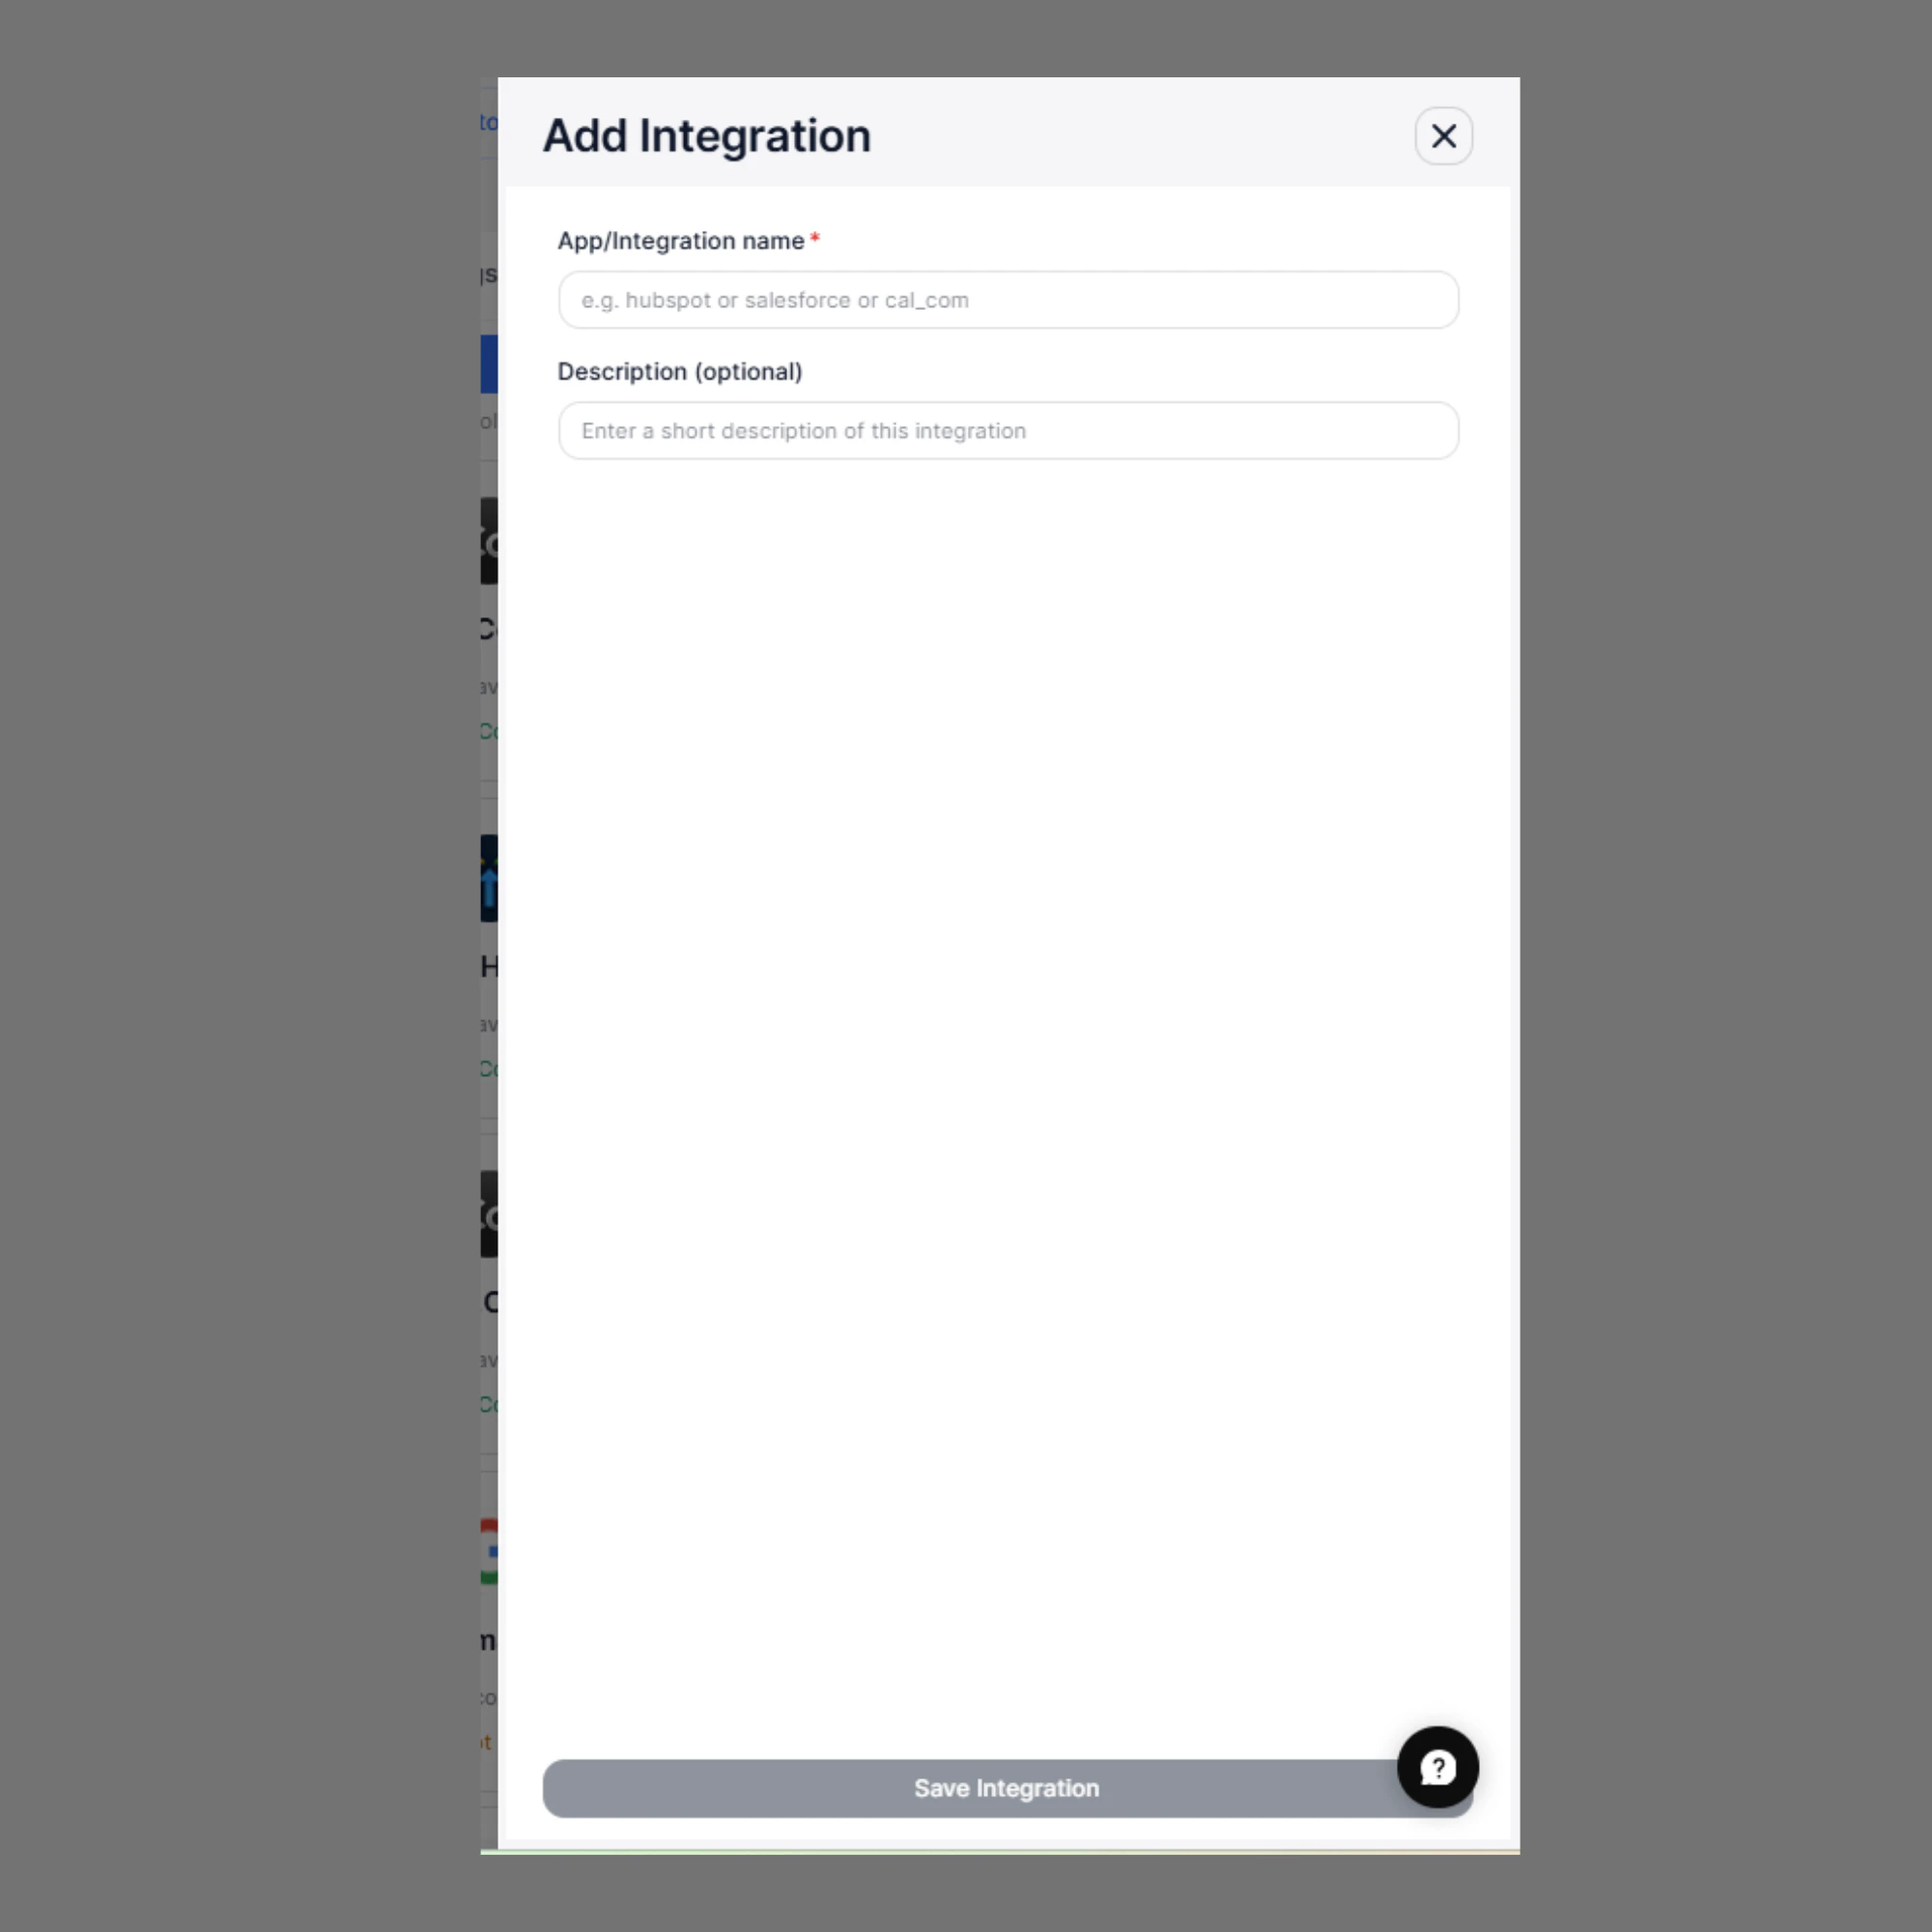
4. Enter the following:
| Field | Description |
| :--------------------- | :---------------------------------------------------- |
| App/Integration name | Name of the external app (e.g., Calendly, Custom CRM) |
| Description (Optional) | Description of the tool |
Click **Save Integration**
The newly created custom tool will appear in your **Tool Library**.
***
## Step 2: Configure Authentication
Before creating actions, configure authentication based on the app’s API.
1. Click the app or custom tool that you want to configure authentication for.
2. Click **Configure Authentication**
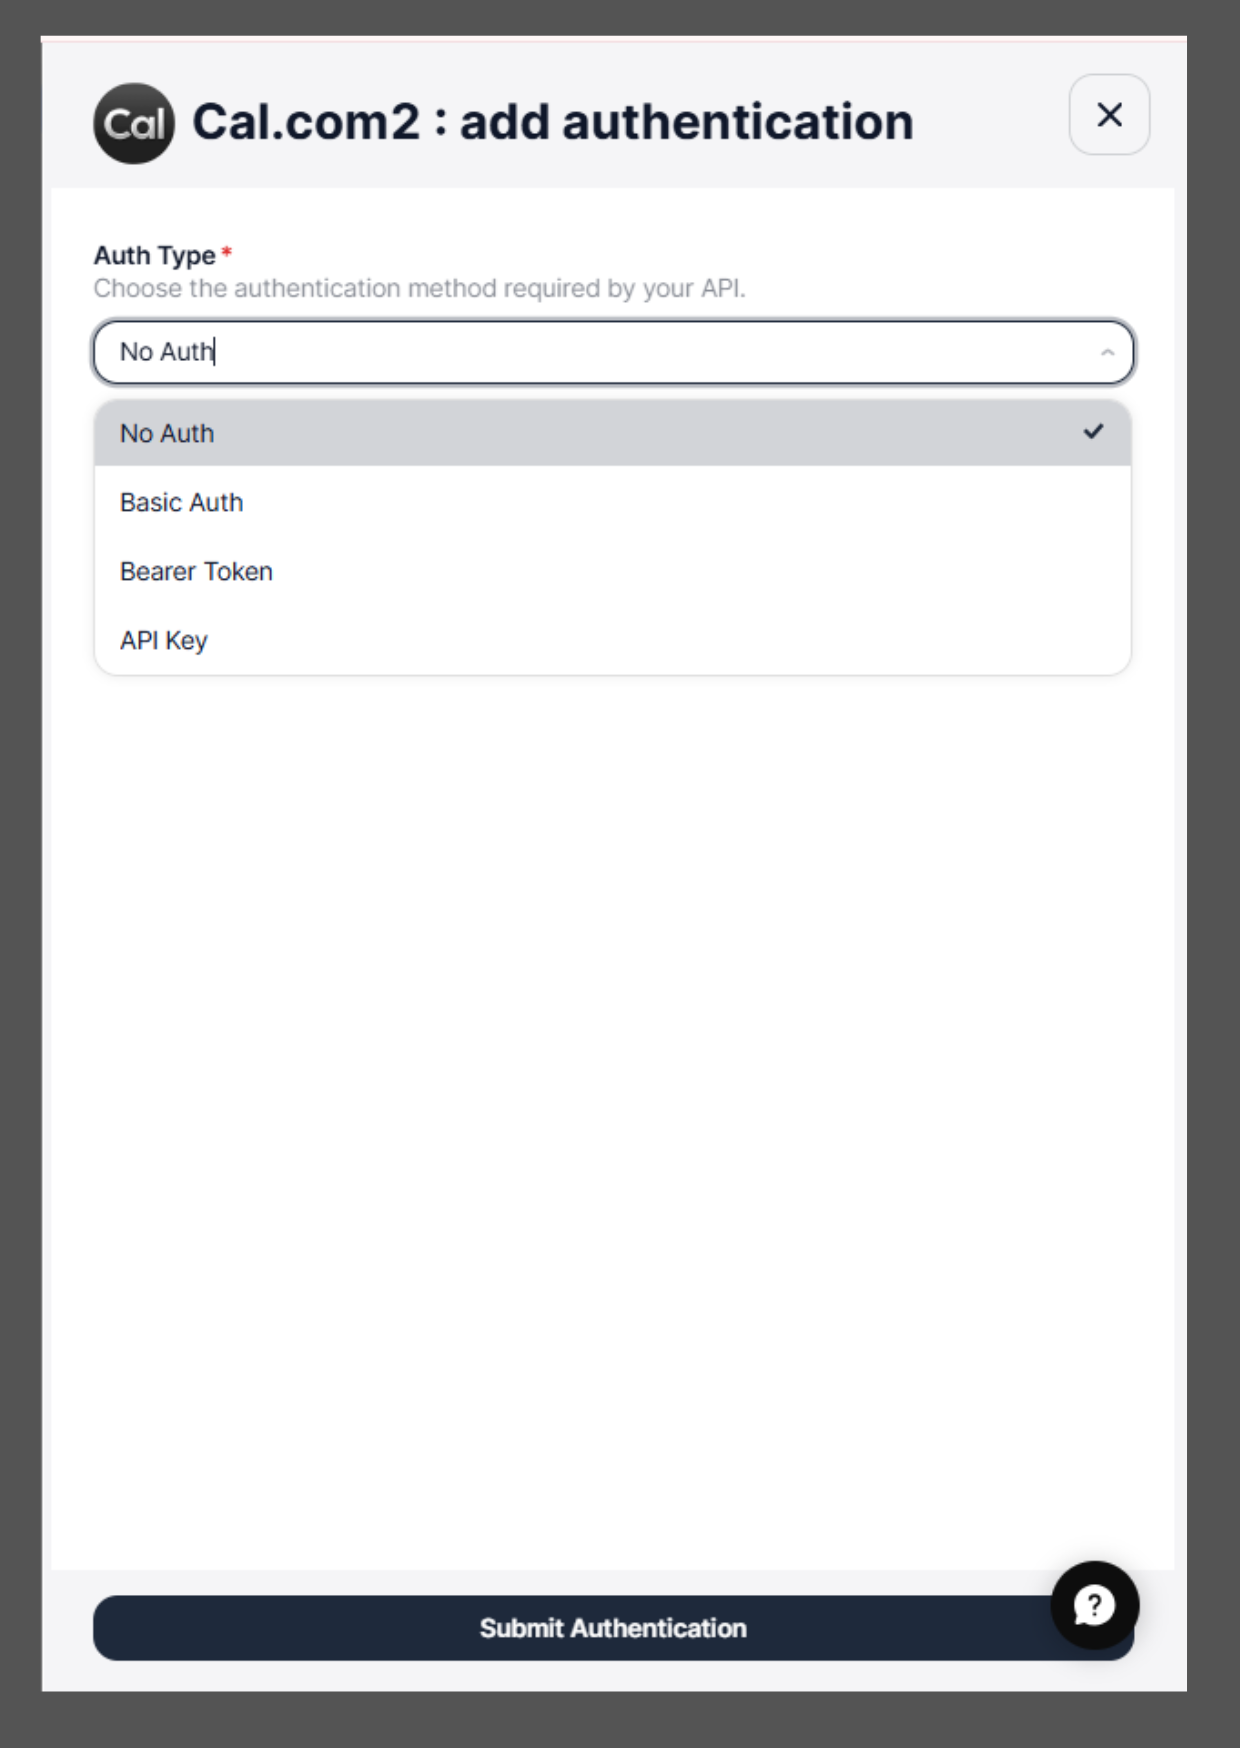
3. Select the required Auth Type
4. Enter credentials
5. Click **Submit Authentication**
SigmaMind AI will automatically use this authentication in API requests.
For detailed instructions on authentication types and configuration steps, refer to this [How to Configure Authentication](/documentation/tools/authentication)
### 2. Using the API
Create an integration programmatically using the [**Integrations API**](https://docs.sigmamind.ai/api-reference/integrations/create-integration).
### **Field descriptions**
| **Field** | **Required** | **Description** |
| :---------- | :----------- | :--------------------------------------------------------------------- |
| name | **required** | Human-readable name for the integration (e.g. `Stripe`, `HubSpot CRM`) |
| description | **optional** | Short description of what this integration connects to |
shellCopy
```text theme={null}
curl --request POST \
--url https://api.sigmamind.ai/v1/integrations \
--header 'Content-Type: application/json' \
--header 'X-API-Key: ' \
--data '{
"name": "Stripe",
"description": "Payment processing integration"
}'
```
The response contains an `integrationId`. Save it — every subsequent auth and tool call requires it.
 ### Steps:
1. Open **Agent Builder**
2. Click the **Tool Library**
3. Click **Add New Integration**
4. Enter the following:
| Field | Description |
| :--------------------- | :---------------------------------------------------- |
| App/Integration name | Name of the external app (e.g., Calendly, Custom CRM) |
| Description (Optional) | Description of the tool |
Click **Save Integration**
The newly created custom tool will appear in your **Tool Library**.
### Steps:
1. Open **Agent Builder**
2. Click the **Tool Library**
3. Click **Add New Integration**
4. Enter the following:
| Field | Description |
| :--------------------- | :---------------------------------------------------- |
| App/Integration name | Name of the external app (e.g., Calendly, Custom CRM) |
| Description (Optional) | Description of the tool |
Click **Save Integration**
The newly created custom tool will appear in your **Tool Library**.
 ***
## Step 2: Configure Authentication
Before creating actions, configure authentication based on the app’s API.
***
## Step 2: Configure Authentication
Before creating actions, configure authentication based on the app’s API.
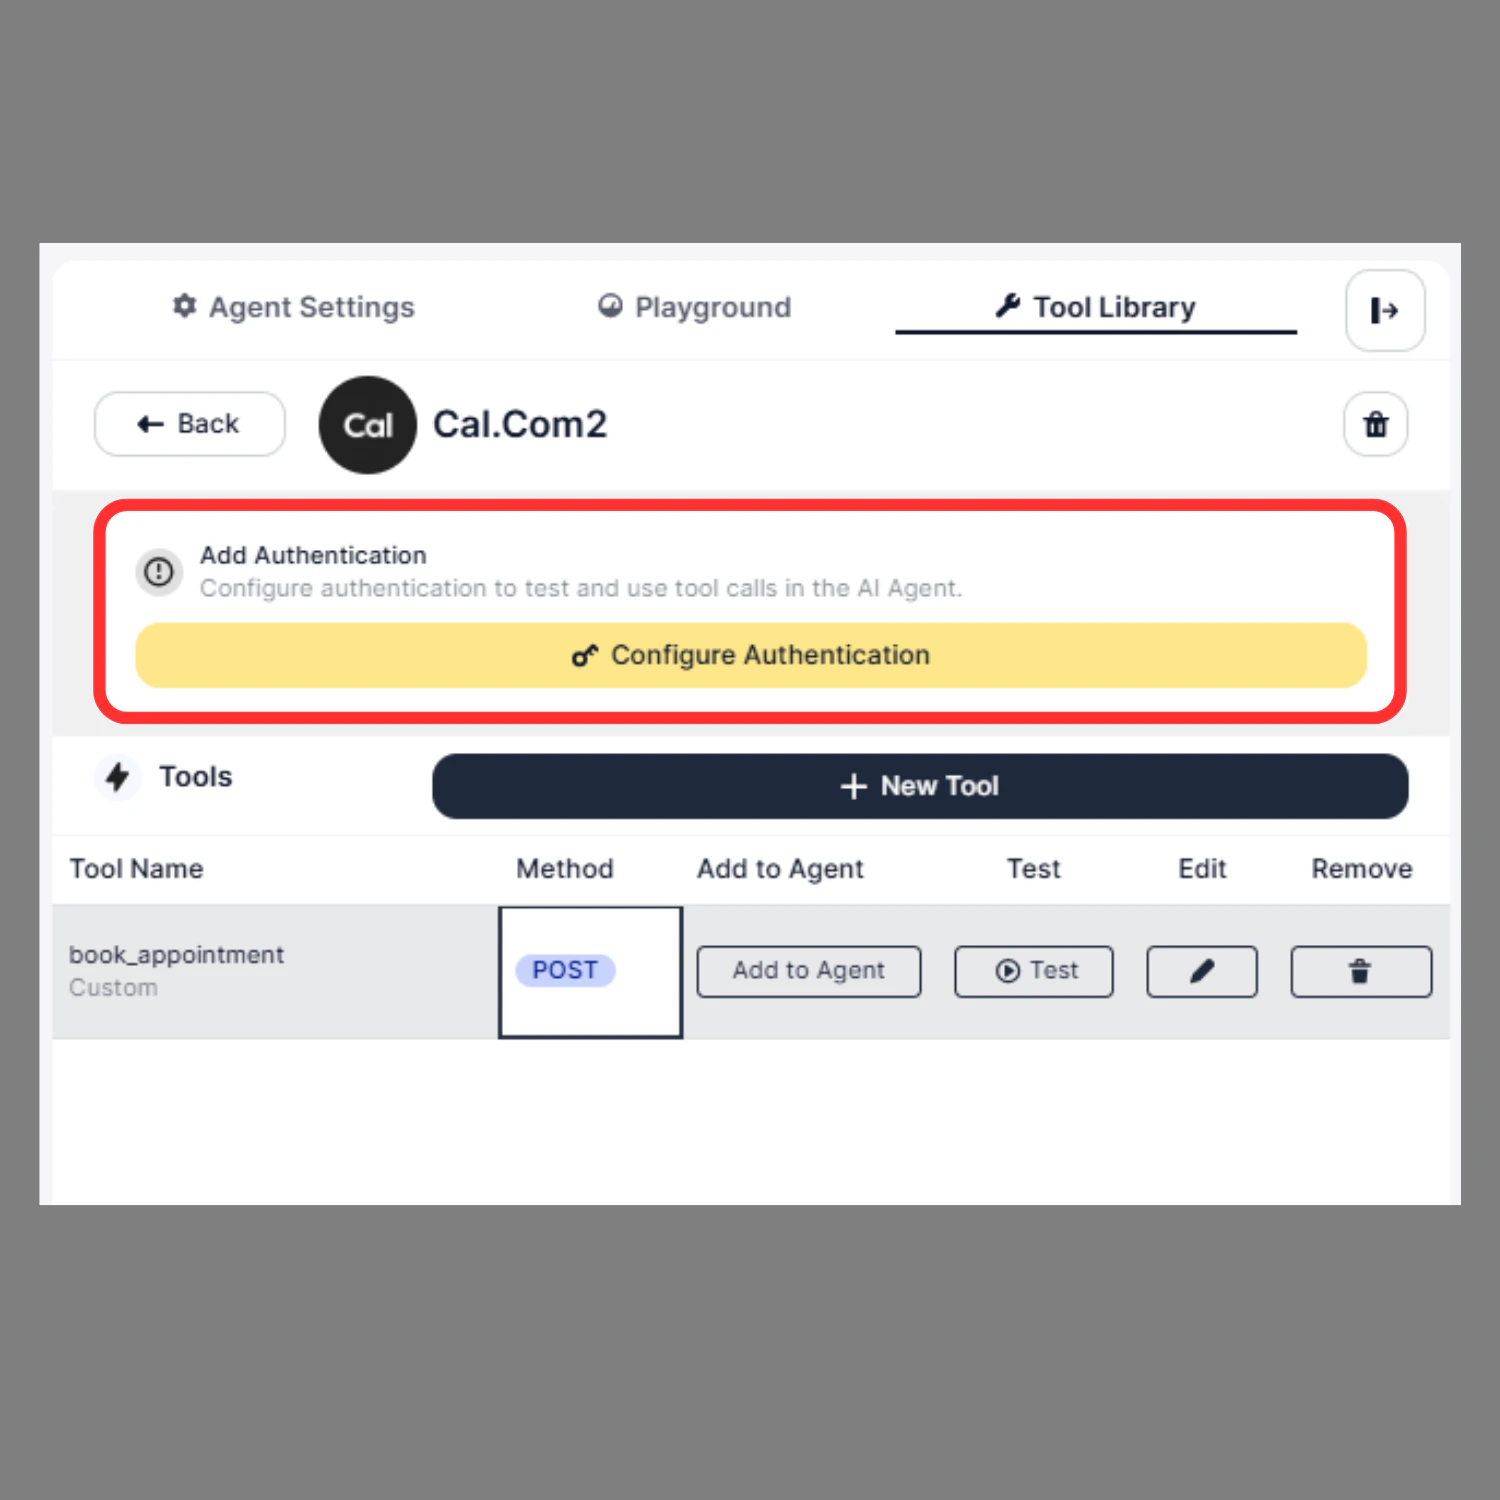 1. Click the app or custom tool that you want to configure authentication for.
2. Click **Configure Authentication**
3. Select the required Auth Type
4. Enter credentials
5. Click **Submit Authentication**
SigmaMind AI will automatically use this authentication in API requests.
1. Click the app or custom tool that you want to configure authentication for.
2. Click **Configure Authentication**
3. Select the required Auth Type
4. Enter credentials
5. Click **Submit Authentication**
SigmaMind AI will automatically use this authentication in API requests.